Having a Continuous Integration (CI) and Continuous Delivery (CD) process during the various stages of development helps to reduce risks, catch bugs more quickly and rapidly deploy software to various environments. These benefits result in developers being able to implement business requirements and user needs more quickly and turning the process of releasing software into a business advantage.
Tools
There are many tools out there to accommodate CI and CD for your application such as TeamCity, Jenkins, GitLab CI, Bamboo, Team Foundation Server, etc. In this case we're going to setup CI (and later on CD) using Jenkins and Atlassian Bitbucket.
Jenkins is an upcoming populair open source Continuous Integration and Continuous Delivery tool that provides you to automate builds and deployments for various programming languages. There is an extensive plugin library available that allows you to use and configure tools like MSBuild and MSTest in your job with ease.
Automate IT
To actually create and setup a job, a few prerequisites are required:
Prerequisites
- Setup a VM or physical server running Windows.
- Install Jenkins.
- Install Visual Studio or Microsoft Build Tools.
- Install Git for Windows (or any other code repository client tools).
- Create a Bitbucket (or any other code repository) account and create a repository for your code.
- Install the MSBuild plugin for Jenkins.
- Install the MSTest plugin for Jenkins.
- Install the Git plugin for Jenkins.
To compile and test your .NET application using Jenkins, MSBuild and MSTest are obviously required. I recommend installing Visual Studio which contains all the necessary tools to compile, test and measure your application rather then installing the trimmed down Microsoft Build Tools, especially if you are using the Microsoft Fakes framework in your unit tests. Installing Visual Studio Ultimate or higher next to Jenkins would be the best approach to cover that scenario so you are able to run those unit tests using Jenkins.
Configuring plugins
The installed plugins must be configured in order to use them. Go to the Configure System section in Jenkins and fill in the paths to the executables for the Git, MSBuild and MSTest plugins.
Step 1: Create a new job
To create a new job in Jenkins, navigate to the Jenkins web interface using your favorite browser and click on the New item button. This navigates to the screen below:
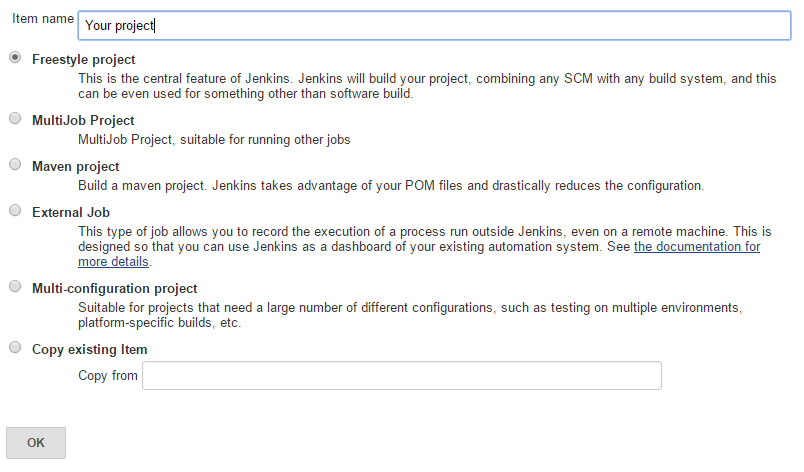 Fill in your project name, select
 Freestyle project and click OK. The Freestyle project job type consists of all the necessary elements such as SCM integration, build scripts and optional steps required for our project.
Step 2: Connect your repository
The next step is to connect your repository so Jenkins knows where to find and pull your code. Scroll down to the section Source Code Management and select Git:
 Fill in your repository URL and create a user within Jenkins that has at least read access to the configured repository. In this case we will be pulling and monitoring the
 master branch for changes.
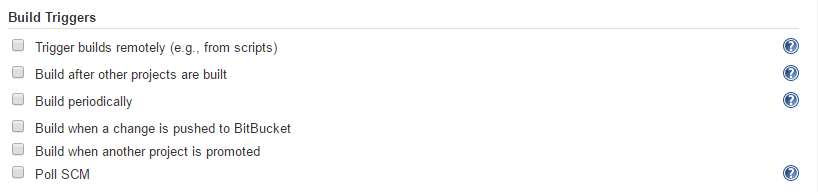
Now, Jenkins is not pulling code automagical, first a build trigger must be created. Bitbucket offers integration with Jenkins via webhooks or repository hooks. A hook can be made to trigger a job when SCM changes occur. I would recommend configuring a hook over polling manually to reduce the number of jobs running on Jenkins. If you want to manually poll your repository, just check the Poll SCM or Build periodically checkbox in the Build Triggers section.
Step 3: Add a build step
To actually compile your project or solution that Jenkins pulled from your repository, a build step must be created. Scroll down to the Build section, select Add build step and choose Build a Visual Studio project or solution using MSBuild. The following step is created:
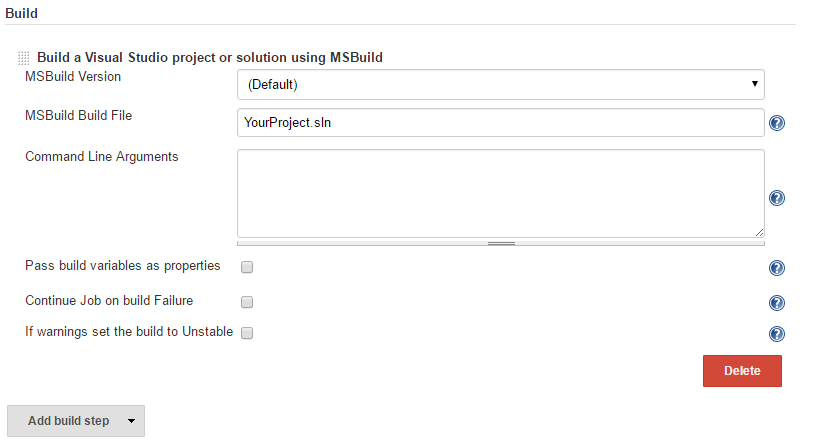 Select the version of MSBuild you want to use, in this case we will use the
 Default one. And enter the path to the solution or project file that has to be compiled using MSBuild. In our case we are compiling YourProject.sln. The solution file is in the root of the working directory, so no additional path prefixing is required.
Step 4: Run unit tests
The last thing to do is to create a build step to run your unit tests after your code has been successfully compiled. To do this, select Add build step again and choose Run unit tests with MSTest:
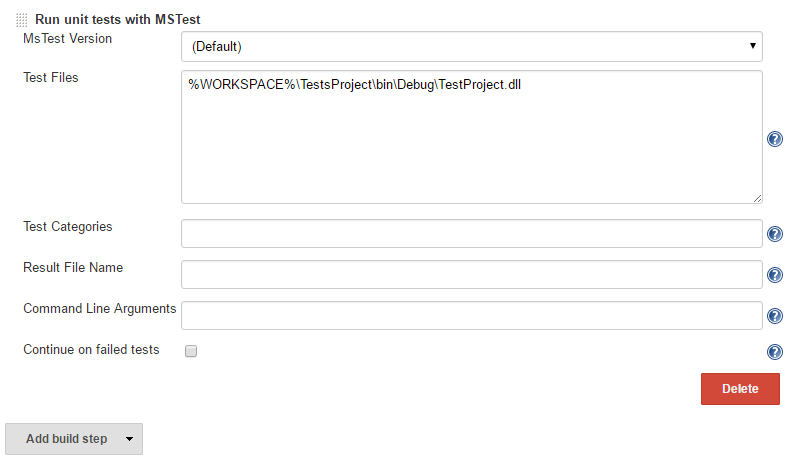 Select the version of MSTest you want to use, again in our case we will use the
 Default one. And enter the paths to the dlls containing your unit tests.
Next step
And there you have it, a fully automated Jenkins job that pulls code from the repository when a SCM change occures, compiles it and runs unit tests. Ofcourse these are the minimal steps required to create a Continuous Integration job for your project, many other options can be configured such as pushing notifications to Slack, parameterizing builds, creating reports, etc.
The next step is to configure Continuous Delivery (CD) using Jenkins, check out my next blog post to do so.